

Chat bubble
The Chat bubble is a floating button on your website that opens a chat panel. Use it to answer visitors on any page, with AI answers, human support, or both.
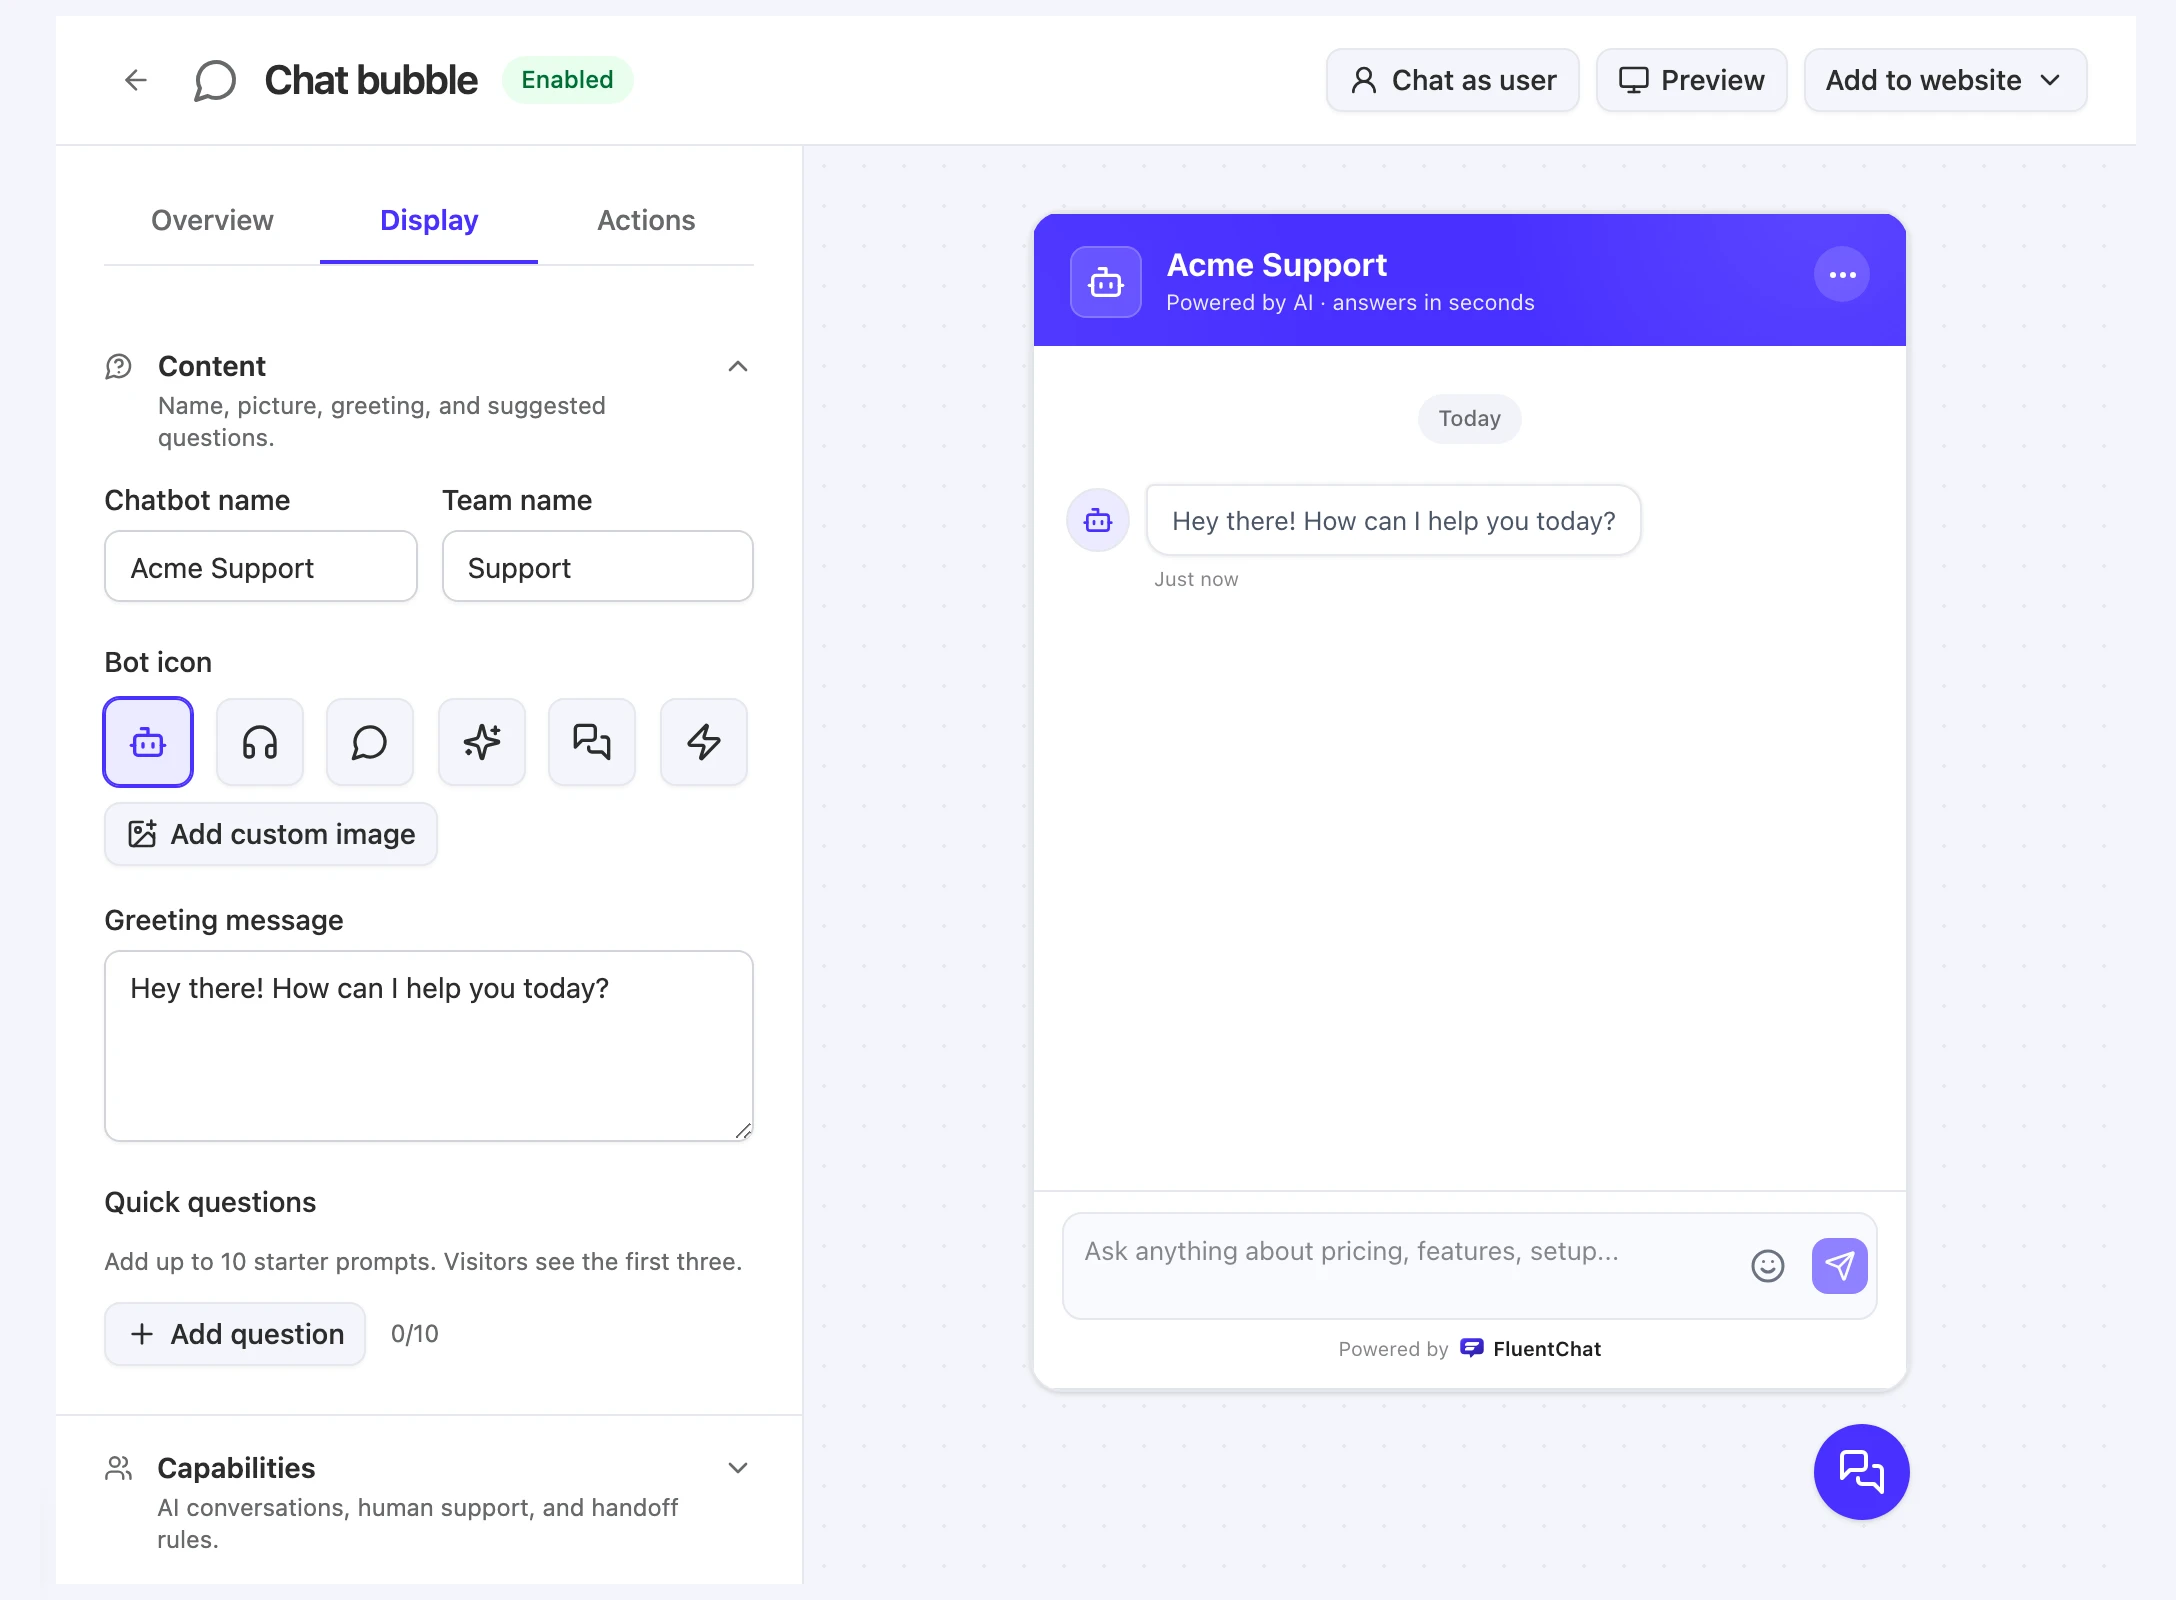
Open Bot > Channels > Chat bubble. The header has Chat as user, Preview, and Add to website. The settings panel has three tabs, Overview, Display, and Actions, and a working test chat sits on the right.
Before you start
- You need widget edit access to open and change the Chat bubble: Owner, Team Admin, Bot Admin, or Bot Editor with access to this bot.
- The Chat bubble starts Disabled on a new bot. Visitors can’t use it until you turn it on.
Set up and publish the chat bubble
-
Turn the channel on. In Bot > Channels, turn on the Chat bubble availability switch. The card label changes to Enabled.
-
Open the Chat bubble. Select Open on the Chat bubble card.
-
Customize the display. On the Display tab, set the name, greeting, colors, and button. Changes save automatically. See Display tab below.
-
Test it as a visitor. Chat in the test chat on the right, or select Chat as user to test as a signed-in user. See Test the chat bubble.
-
Add it to your website. Select Add to website, then choose Website widget, Website iframe, or WordPress. See Add chat to your website.
Test the chat bubble
You can test the Chat bubble before visitors see it, including while it’s disabled.
| Control | What it does |
|---|---|
| Test chat (right side) | A working chat for this bot. The floating button below it shows your Floating bubble settings. Select the button to focus the chat. |
| Chat as user | Starts the test chat as a signed-in test user. Enter a User ID and Metadata as a JSON object, then select Chat as user. “Test users are separate from your customers.” |
| Preview | Opens the Chat bubble in a new browser tab so you can try it at full size. |
Test chats are real bot conversations. Actions allowed on this channel can run, so test actions that change data with care.
Display tab
The Display tab has four sections. Changes save automatically. If a save fails, the tab shows Couldn’t save · Retry.
Visitors see saved changes the next time the widget loads on your page.
Content
“Name, picture, greeting, and suggested questions.”
| Setting | What it does |
|---|---|
| Chatbot name | The name in the chat header. |
| Team name | The team label visitors see, such as Support. |
| Bot icon | The picture in the chat header. Choose Robot, Support, Chat, Sparkles, Messages, or Flash, or select Add custom image. |
| Greeting message | The first message visitors see when they open the chat. Up to 500 characters. |
| Quick questions | Starter prompts visitors can select. “Add up to 10 starter prompts. Visitors see the first three.” Each one can be up to 200 characters. |
Add custom image lets you upload a PNG, JPG, GIF, WebP, or ICO file up to 1 MB, or paste a public image URL.
Capabilities
“AI conversations, human support, and handoff rules.”
| Setting | What it does |
|---|---|
| Visitors can chat with | Choose AI (“Answers questions automatically”), Human (“Connects visitors with your team”), or both. “Keep at least one conversation type available.” |
| Conversation starts with | Which conversation type opens first. Shown when both are available. |
| Let visitors switch between AI and Human | ”Show a conversation-type control in the widget header.” Shown when both are available. |
| Show team as online | ”Controls the availability shown in the widget header.” |
| Offer a human after failed answers | Shows a connection option after this many missed answers, from 0 to 10. Set it to 0 to turn it off. Shown when Human is available. |
| Offer a human while the team is offline | ”Visitors can start a conversation and receive a reply later.” Shown when Human is available. |
| Auto-reply when agents are slow | ”Send a holding message if no agent replies in time.” When on, set Send after (minutes), from 1 to 60, and the Auto-reply message, up to 500 characters. |
If Human isn’t selected, the section shows “Enable Human above to configure handoff rules.”
Style
“Colors, header treatment, and attribution.”
| Setting | What it does |
|---|---|
| Colors | Primary, Secondary, and On-primary text. Each has a color picker and a hex field. On-primary text is the text color on top of the primary color. |
| Header style | Gradient, Solid, or Minimal. |
| Show FluentChat attribution | ”Show the Powered by FluentChat footer.” |
Floating bubble
“The floating button visitors use to open chat.”
| Setting | What it does |
|---|---|
| Position | Right or Left. New bots use Right. |
| Floating button icon | Message square, Message circle, Chat bubble, Sparkles, Bot, or Smile, or a custom image. |
| Show button text | ”Show a short label such as ‘Ask me’ beside the icon.” |
| Floating button text | The label next to the icon, up to 30 characters. Shown when Show button text is on. |
Overview tab
The Overview tab shows the Model, the bot’s Data sources, and the Instructions this channel uses. See Settings every channel shares.
Actions tab
The Actions tab sets which configured actions the Chat bubble can use. Knowledge search is always available. See Actions.
Conversation forking
Visitors can branch a new AI conversation from a saved message. Selecting the fork control asks: “Fork this conversation? This starts a new AI conversation using the messages up to this point as context. Your current conversation stays unchanged, and the AI continues from here.”
Forking is available only while AI is one of the conversation types, and only for messages that have finished sending.
Limitations
- Each bot has one Chat bubble configuration. Every page that embeds this bot’s Chat bubble shows the same settings, including the iframe embed. To show different settings, use another bot.
- Custom images must be public. A pasted image URL must be publicly reachable from your visitors’ browsers.
- Uploaded images are limited to 1 MB.
Troubleshooting
The chat bubble doesn’t appear on my website
Possible cause: The Chat bubble is disabled. New bots start with every channel disabled.
Solution: In Bot > Channels, turn on Chat bubble availability, then reload your page. For other causes, see Add chat to your website.
Visitors still see the old bot name after I renamed the bot
Possible cause: The Chat bubble’s Chatbot name doesn’t follow the bot’s name in Bot > Settings.
Solution: Change Chatbot name under Display > Content, then reload your page.
Visitors can’t reach a person
Possible cause: Human isn’t selected under Visitors can chat with, or Offer a human after failed answers is set to 0.
Solution: Select Human under Capabilities, and set a failed-answer count above 0 if you want automatic offers. To let the AI offer a person when asked, allow the Live chat action on this channel.
Couldn’t save · Retry
Possible cause: A display change didn’t save.
Solution: Select Couldn’t save · Retry. If you leave the page with unsaved changes, the app asks before discarding them.